Pond Construction- Choosing the Right Rocks
 August 19th, 2016
 PondMeister
Credit to Aquascape pros for this helpful article.
Rocks, like plants, have a dual role in both the aesthetics and function of a water feature. Different types of rock can greatly affect the design of your pond. Let’s talk about aesthetics first since rock selection is critical to the look of a pond or waterfall.
With so many types from which to choose, and taking into consideration the dramatic difference in indigenous rock across the country, it is impossible to name one type as the best for a water feature. However, there are some general guidelines to help you choose the right rock for the situation.
Use Rock that Occurs Naturally in the Area
When you use rock that’s indigenous to the region, you’ll be better able to tie the features in with the surrounding landscape. An added bonus is that the rock won’t have far to ship, thereby reducing your cost of materials.

Avoid Mixing Different Types of Rock
You want a cohesive, natural look to the water features you create, so it’s best if you use the same type of rock throughout the project. Too many types make the pond look thrown together and unattractive.

Use Varying Sizes of Rock
Make sure to get a variety of sizes when choosing rocks for your next project. A good rule of thumb is to use the 1:2:1 ratio. 1 part small rock, 2 parts medium rock, and 1 part large rock. The varying sizes of rocks help to give each other scale. The large stones look large because there are smaller stones around it, and vice versa. Not to mention, this is the most natural look for a pond or waterfall.

So what about the role that stones play in a water feature? Rocks add support to the structure, and when used to line the bottom of the pond, help protect the pond’s liner from harmful UV rays. Finally, rocks and gravel give beneficial microorganisms a place to grow.
 Pond Tips | Comments Off on Pond Construction- Choosing the Right Rocks
Summer Pond Care - Tips from Aquascape
August 10th, 2016
PondMeister
From Aquascape Blog, August 2, 2016
As we approach the dog days of summer there are things that you need to remember about your water feature in order to keep a balanced ecosystem pond along with happy fish! Take a moment to refresh your memory with these critically important tips.
 1. Add oxygen to your pond by placing an aerator or AquaForce pump in your pond. You can also install a fountain with a pump if your pond doesn’t have a waterfall or stream built in.
2. If you feed your fish, feed them in the morning and be careful not to overfeed. Uneaten food decays faster in warmer water and can pollute the pond. Choose from a wide variety of Aquascape Fish Food.
3. Be sure to remove dying leaves and flowers before they have a chance to decay in the warmer water.
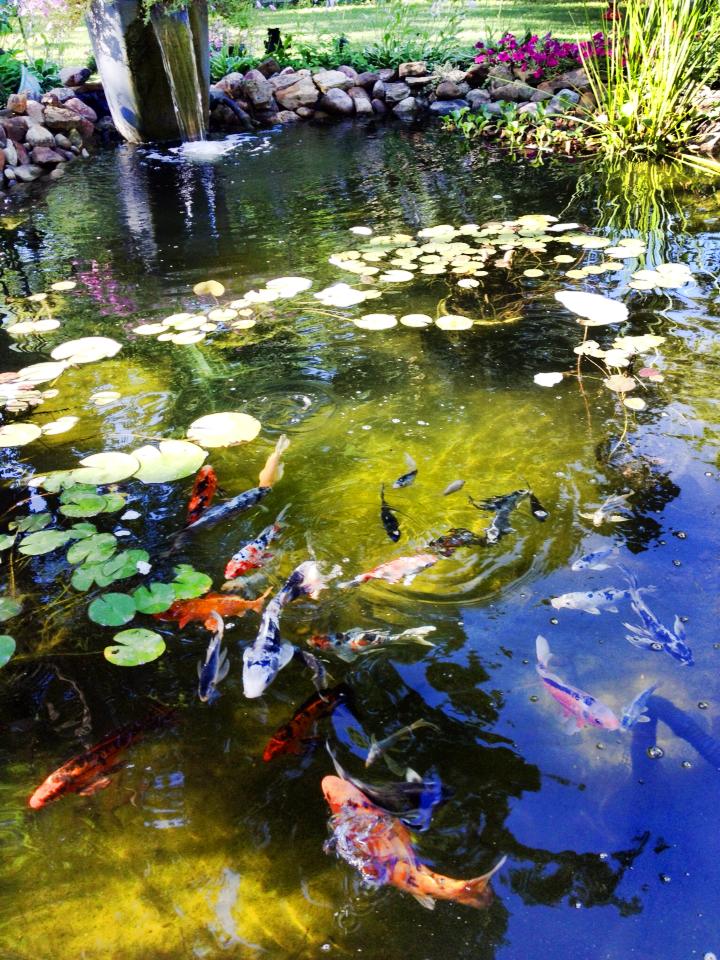
4. Aquatic plants such as waterlilies help provide fish with shade from the heat of summer sun, cooling the water and making algae control easier too.
Is there really a leak?
Often, people do not realize how much water can evaporate from a pond during the days of summer.
The Midwestern states typically lose 1 to 1.5″ of water each week.
Pond owners in the hot, arid Southwest have reported evaporation levels in excess of 3″ a week.
Remember, these are averages. Some ponds may not experience evaporation levels this high. Other ponds with large pumps pushing high volumes of water, or ponds designed with multiple waterfalls and a lot of cascades and splashing may have evaporation rates much greater than these.
Pond Tips | Comments Off on Summer Pond Care - Tips from Aquascape
Planting Water Lilies
July 18th, 2016
PondMeister
Reprinted from the Aquascape blog.
Colorful lilies transform your pond into a beautiful water garden. Read on for great tips from the Aquascape experts.

Two basic methods exist for planting water lilies. You can incorporate plant pockets within the pond itself, or use Aquatic Plant Pots. The method you choose should be considered prior to pond construction. The actual planting of the lily will be the same, however, regardless of your chosen planting option.
The first thing you’ll want to do when planting water lilies is to determine the size and location of the lilies. Water lilies adjust their growth to the size of the area they’re planted in. Size the plant pocket or aquatic pot according to the size of the pond. As a general rule, your plant pocket should be 16” to 18” wide by 6” deep. If you choose to use an aquatic plant pot, Aquascape’s Aquatic Lily Pot is a great choice.

In a large pond, you may want the lilies to grow larger. Planting them in even larger plant pockets provides them with enough space to grow proportionate to the size of the pond. The size of the plant pocket in a larger pond should be about 24” wide.
If you choose to plant water lilies using an aquatic pot, your hole in the pond should be just deep enough so the top of the pot is level with the bottom of the pond excavation. Allow a little extra room on the sides for folds in the liner. Ultimately, when the floor of the pond is graveled, it will have a flat, consistent appearance with no pots showing. If you are installing a water lily in an existing pond that doesn’t have planting pockets, you should create a ring of rocks around the lily pot to hide it.
Water Lily Placement
Placement considerations are important, too. Water lilies do not like heavy water movement or water splashing on their foliage, so they should not be located close to a waterfall or the base of a stream. Also, the lily should not block the flow of water and debris into the pond’s skimmer.
Planting the Water Lily
After the liner is in place and the pond has been rocked, clean out any gravel that has fallen into the planting pocket. If you’re using an aquatic pot, place the pot down into the hole you created and fill the area around the pot with gravel so the pot isn’t visible.
If you’re planting the lily directly in the pocket, fill it to within one inch of the top with Aquascape Pond Plant Potting Media. Avoid using any type of potting soil that contains other added media, as it will float in the water. It’s also important to make sure the soil has not been treated with any type of chemical that might harm the fish.

Fertilizing Water Lilies
Fertilizing water lilies on a regular basis is highly recommended to optimize their beautiful blooms. Time-released, granular fertilizer mixed into the soil at the bottom of the pot or plant pocket is a great way to fertilize lilies at the time of planting. When fertilizing existing water lilies, tablets are a great option since you simply push them into the soil.
Whichever fertilizer you use, be careful not to put it in direct contact with the plant’s roots. Instead, push tablets against the sides of the pot, away from the plant. Mix granular fertilizer in only the bottom of the pot or plant pockets.
Keeping Plants Healthy
To keep water lilies healthy and vibrant throughout the pond season, remind your customers to remove yellow or dead leaves, along with any spent flowers, on a regular basis. This prevents decaying foliage from sinking to the bottom of the pond and decomposing. Stems should always be pruned back as close to the water lily rhizome as possible.
Water lilies are the jewels of the water garden and are available in an amazing variety of types, sizes, and colors. Choose from our selection of water lilies to enhance your pond.
Pond News, Pond Tips | Comments Off on Planting Water Lilies
Why Skimmers Are the Workhorse of the Pond By Gary Wittstock with Ed Beaulieu
January 20th, 2016
PondMeister
The year was 1988; we were in the 6th year of our hobby, we had a love/hate relationship with our pond as most pond owners did during the early years of the hobby.
The allure of a crystal clear pond was nothing short of a dream as it was only achieved the day after it was filled with fresh water.
As the season progressed the fish slowly disappeared under a cloudy layer of surface scum and green water not to be seen until the next year’s pond clean out. And what a mess that always was!
Our quest had begun!
How could we lower our maintenance and improve overall water quality?
We started experimenting and researching everything we could but this was pre-Internet, we actually had to go to the library to find information on our new found love affair with aquatic ecosystems…

Pond pumps are difficult to access if not using a skimmer.
Some of our challenges with our first concrete soup-bowl pond were:
- Clogged pumps that sat at the bottom of our pond
- The challenge of hiding the pump hose from the pond to the falls
- The large quantity of debris that accumulated each year on the bottom of the pond (2-3″ of pond-scum)

The HARD WAY to skim clean a pond.

Clogged pump from in pond use.
Shazam! What do we find but a Family Handyman article on skimmers for ponds. Jackpot. It was a garbage can fitted with a pool skimmer. Finally a way to catch debris before it sank to the pond bottom, hide the pump outside the pond AND… get the pump tubing outside the pond without trying in vain to hide the pump discharge pipe. That pipe could now be buried outside the pond as it headed over to the water fall because the pump itself could be installed outside the pond.

Garbage can skimmer
If there was just one filter I could choose when installing a pond, hands-down it would be a skimmer. Here’s why: A pump is necessary to create circulation for filtration and to create a waterfall (one of our favorite pond features!). And as long as you’re going to have a pump why not move that pump outside the pond so it can move surface water to create a skimming action and be easily accessed for service. Also, and this is HUGE. ALL PONDS ACT LIKE DIRT TRAPS. As the winds blow the currents carry all manner of dust and debris that are captured by the surface of the water. All this dust and debris like leaves and seeds in particular, get trapped by the water and soon sink to the bottom of the pond. Once there they will foul the water, turn into “pond scum” and are very difficult to remove without draining the pond. Even bottom drains which do help keep deep ponds cleaner cannot clean the entire bottom of a pond without jets, aeration and other complex and costly additions. But by simply placing and hiding a pump outside the pond the simple power of that pump in a well-designed skimmer filter will PREVENT most pond debris from ever sinking into the pond by skimming the surface while this debris is still floating on the pond’s surface. Skimmers are essential to keep any body of water as clean as possible and there’s no better filter for reducing pond maintenance and keeping the water safe for your fish!

Original Skimmer design.
I’ve heard and understand arguments that moving the pump outside the pond impairs full top-to-bottom pond circulation. On shallow ponds like water gardens that are two feet or less deep this is not an issue. The skimmer alone will create enough current in the pond to ensure full circulation. On deeper ponds that are 4 or 5 feet deep jets or bottom drains can be added to ensure optimal circulation.

Placing the pump in the deepest area draws currents from the waterfall, but not the far end of the pond. Locating a skimmer on the opposite end from the waterfall ensures full pond circulation.
Also locating the skimmer on the perimeter will automatically increase the overall circulation of the pond versus having the pump located on the bottom in the deepest point. Ideally place the skimmer on the opposite side of the pond from the waterfall for optimum circulation.
A skimmer acts as a safety system for your pond and fish, if any type of water loss or leak occurs in the piping system, waterfall or stream; the skimmer will only allow the water loss to occur in the top 6″ of the pond or basically to the bottom of the skimmer opening. When the pond water level reaches that point no more water will enter the skimmer so the pond will stop draining! When the pump or bottom drain are located on the bottom of the pond they will completely drain the pond of water during a leak leaving the fish high and dry! I’ve heard many a horror story of just that happening and it’s truly tragic.
The skimmer is also the perfect measuring device; the skimmer opening will show the optimum water level so there’s no guessing what the water level is.
The skimmer is a solid connection point for a waterfill device; the water level can easily be established using the skimmer opening as a measurement. Later in its evolution we added the overflow fitting to deal with excess water.
A skimmer has multiple barriers in place to keep critters from getting to the pump compared to putting a pump directly in the pond.
When we tore out portions of our classroom concrete pond to fix the leaking basin and ugly pond edges, we also added a new garbage can skimmer complete with its own set of wheels. We followed the directions from the article and added a net bag that we purchased from a dry cleaner. It was a laundry bag that was quite strong and suitable for catching the debris our new skimmer would collect from the pond’s surface. We purchased a swimming pool skimmer with a 6″ opening and built-in plastic weir that floats on the surface of the pond. This is a very valuable part of the skimmer design as the floating weir ensures optimal surface flow so most of the pond debris gets pulled into the skimmer net or filter pads before it can sink. We modified the standard swim pool skimmer by cutting off the circular collection basket behind the weir. In swimming pools this is where the external pump is attached. We much prefer to use submersible pumps so by cutting off the collection basket we could then simply attach the weir and holder to the face of the garbage can, inserting a submersible pump into the garbage can under and behind the debris and filter pad(s).
Our new cobbled-together skimmer worked great but the pump, a Little Giant #6 (3,000 gph), had a protective screen to prevent debris from damaging the impeller. That screen clogged every week but we still loved this skimmer. After all, the pump was now OUTSIDE the pond so lifting the pump out of the skimmer was pretty easy. I even installed a flexible radiator hose on the pump discharge and tied a rope to the pump. That way we could just pull up on the pump rope and access the pump & screen for cleaning without taking the plumbing apart or having to wade into the pond. What a maintenance boon!

Pumps could now be accessed easily.
Even though the skimmer worked just as planned we still felt the need to add more filtration. The skimmer was really a mechanical skimmer removing most floating debris before it would sink where it could foul the pond. I thought if we added a filter pad or pads to the skimmer we’d have a large surface area biological filter and that would help clarify the water and process the fish waste safely.

Skimmer cleaning pond of maple seeds
Well we soon found out that since our pond was 1,000 gallons the biological capabilities of this skimmer were still a little too small. (Next week we’ll review the evolution of our BioFalls). However the filter pads did add a huge benefit; the small debris that used to slip through the debris net was caught more effectively by the filter pads. So now the pump lasted much longer before the pump screen needed cleaning.
Also, when a skimmer is used in conjunction with a Biofalls® or any biofilter it increases the efficiency of the filter:
A skimmer’s pre-filtration will protect the biofilter from collecting excess organic debris so it will effectively breakdown fish waste. The biggest problem for biofilters is clogging with too much waste which does not breakdown efficiently. A skimmer also uses water from the surface of the pond which has the highest available dissolved oxygen content. High dissolved oxygen is very important for efficient bacterial utilization of nitrogen compounds(fish waste).
We installed close to 100 ponds with this crude garbage-can skimmer but only one customer ever complained about this kind of “home-made” filter. And when he did I visited with him and told him if he could find a better skimmer we’d install it No Charge. We never heard from him again! By the time we had installed this many skimmers our business had grown to the point that we could afford tooling to build our very own custom Aquascape skimmer. We turned to a plastic manufacturing technique called “rotomolding” as the tooling was relatively inexpensive while the quality of the product was superb. A plastic charge of powdered product was introduced into a mold and the mold was heated and rotated. When the plastic melted it spread out inside the tooling to form the skimmer box. And it concentrated most at all the corners giving us exactly the strength we were seeking. No longer did we need to encase our skimmers in plywood like we did for the garbage can model – LOL. We tested this rotomolded housing by filling it up to the skimmer opening with water and letting it freeze solid. It passed with flying colors!

Winter freeze test
Here’s one of our original drawings to show our customers how the Aquascape skimmer was designed:

Original Skimmer diagram
At Aquascape we’re proud to say this same plastics company we started with in 1994 is in Wisconsin – so we’re able to use an American company for most of our molded plastic products to this day! And year after year we still run into fully functional garbage-can skimmers when we upgrade/enlarge ponds for our past customers – some of these skimmers have been running over 20 years and they still don’t miss a beat!
Notice the Seal of Approval from the National Pond Society? Sadly that organization and their PondScapes publication is not around anymore but we joined up with them in 1994 to help further the causes of our industry when it was just getting off the ground. We’ll do another blog on that group one of these days.
Pond News | Comments Off on Why Skimmers Are the Workhorse of the Pond By Gary Wittstock with Ed Beaulieu
Pond Netting for Fall Pond Maintenance
October 17th, 2015
Laura
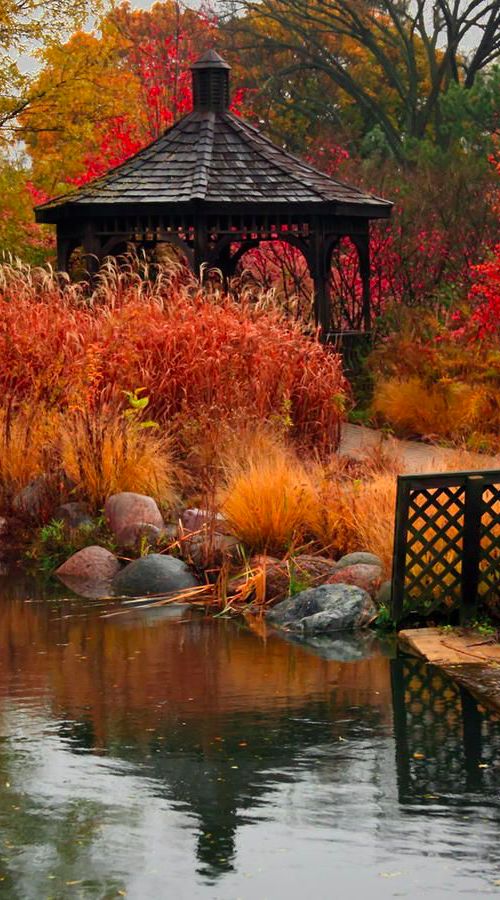 Autumn leaves look beautiful near the pond. But once they fall, there is a lot of clean up required to keep the pond free of debris and rotting leaves.
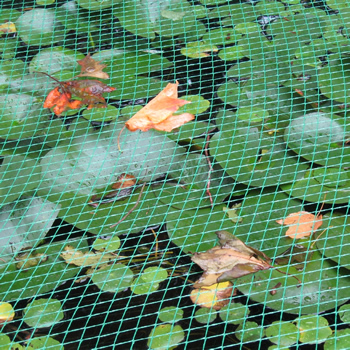
The easiest way to keep the leaves out and simplify your fall clean up chores is to install netting over the pond. Here are a few tips for covering your pond.
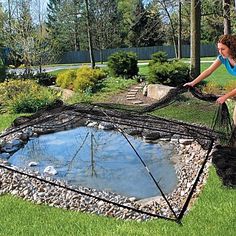
Do it Yourself: # 1 Supplies; 3/4″ or 1″ PVC pipe, 12 -18″ rebar pieces & netting. We recommend Ultra Pond Netting, available in 15′ x 20′, 20′ x 20′ or 20′ x 30′.
Bang rebar along outside edge of pond approximately 18″ away from water’s edge and approximately every 3′ starting and ending about 2′ past the pond on each side, leave about 6″ sticking up.
Take the PVC pipe a stick one end on the rebar and CAREFULLY bend the PVC pipe over the pond and onto the opposite piece of rebar (I do mean carefully, if this slides off and catches you it hurts, once the pvc pipe sits for awhile bent it stays better)
Next stretch your netting over and secure to the ground with pegs. On wide ponds we will also place a support piece in the middle of the pond, using a 5 gallon bucket and clean gravel.
Less of a project, with equally good results, the Big Top Pond Cover or the Pond and Garden Protector offer complete pond cover solutions. Watch how easy it is!
The PondMeister advises:
In both installation methods, watch for sprinkler lines, electric lines, pond plumbing lines.
Netting with smaller holes reduce the amount of debris that gets stuck in the net. When properly cleaned & stored, our nets are still being used after 4 years. Don’t use deer netting! It will only bunch up in a big ball and twigs will easily get tangled in it.
Pond Products, Pond Tips | Comments Off on Pond Netting for Fall Pond Maintenance
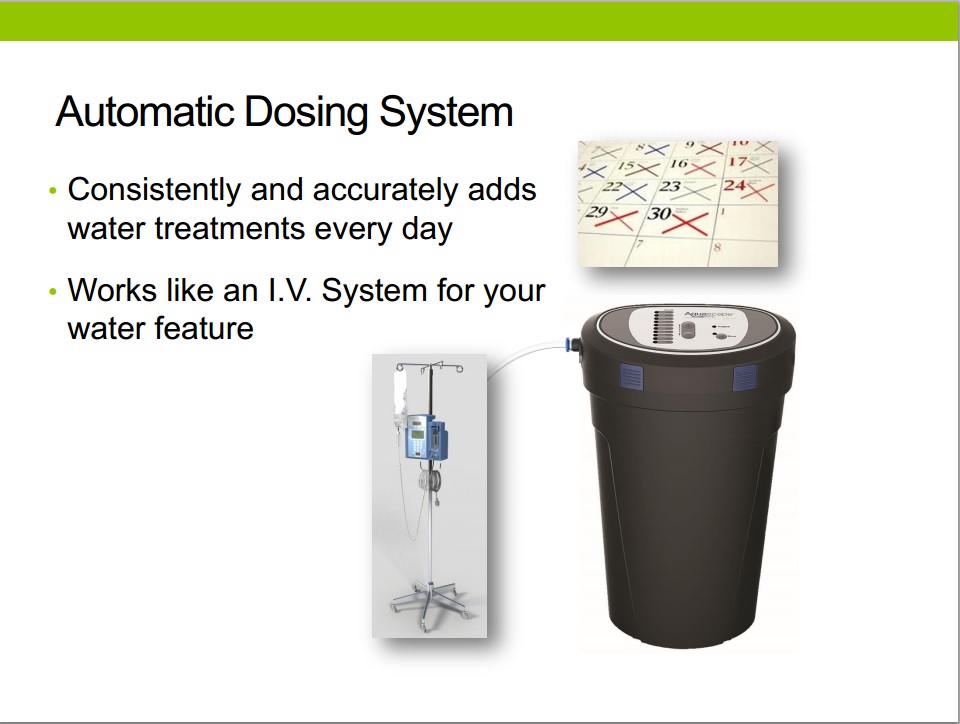
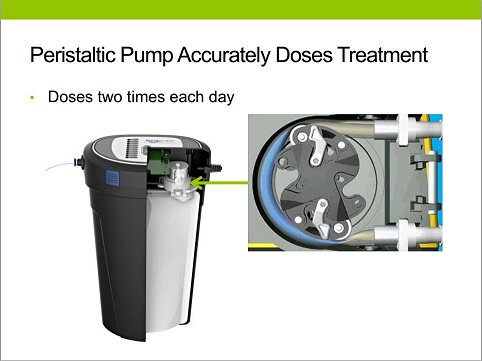
Pond Water Treatment - Automatic Dosing System
February 2nd, 2015
PondMeister
Brand New from Aquascape! The Automatic Dosing System prevents water problems before they begin.
Available March 9th. Free Shipping! Order now at http://bit.ly/1zzYBiO
- Helps maintain optimum water quality
- Easy to use and fully programmable
- Dependable and quiet operation
- Can be used for ponds, fountains, & waterfalls
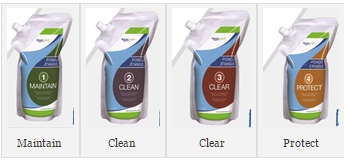
- There are 4 different water treatment products to choose from for use with dosing system.

Pond News, Pond Products | Comments Off on Pond Water Treatment - Automatic Dosing System
Pond Stars is On!
September 11th, 2014
PondMeister
 Are you watching Pond Stars?
This great new series premiered on September 9th and we were delighted to see watch our friends from Aquascape, Greg Wittstock (The Boss), Ed Beaulieau (The Scientist) and Brian Helfrich (The Foreman) work their magic for a television audience. Watch it every Tuesday at 10 pm on NatGeoWild.
Click here to read all about the first episode with behind-the-scenes photos, video, products used on the show, and more!
Products featured in upcoming episodes include:

Pond News | Comments Off on Pond Stars is On!
10 Steps to Clean Pond Water
July 15th, 2014
PondMeister

Water clarity is a major concern for all pond owners. We offer these suggestions for keeping your pond crystal clear.
1. Clean out any leaves, mulch, and any other debris that has collected in the pond. As the natural materials decompose they provide nutrients that feed algae. Net the leaves before they sink to bottom.
Recommended products:
Aquascape Skimmer Net with Extendable Handle
Matala Pond Vacuum II
2. Thin out your pond fish if you have more than 1 goldfish for every 50 gallons of water or 1 Koi fish for every 150-200 gallons on average. If you just can’t part with your pond fish, upgrade your filter and/or add an aerator to handle the extra fish. Another rule-of-thumb is no more than 1 fish inch per every 10 gallons of water.
3. Stop feeding your fish till the water clears! Or at least reduce feedings to 1-2 times a week and scoop out anything not eaten in 10-15 minutes. There should be plenty of natural food in the average garden pond for your fish to feed on.
4. Add or upgrade your filter system to a 2-step system.
Step 1 – Place a pre-filter where the pump is located to provide mechanical filtration.
Step 2- Install a proper size biological filter to convert fish waste into beneficial bacteria. The biological filter is often installed out of the pond, disguised as a waterfall. The biological filter will restore the ecological balance of your pond, and does not require cleaning all season long.
Recommended products:
E Z BioFilters (Versatile Pre Filters)
MicroFalls BioFalls Filter
5. Make sure your pond pump is located on the opposite side of your pond as far away as possible from the waterfall or stream it feeds. This ensures complete circulation and prevents creating stagnant areas. If you see an area where water is not circulating, you might consider adding another Skimmer or Biofalls.
Recommended products:
MicroSkim by Aquascape
6. Add the proper quantity of aquatic plants especially submerged plants and floating plants for your size pond. Place floating plants in a stream, near a pump, etc. where water is continuously pulled past their roots. These plants will rob the algae of nutrients and provide shade to block the sun which green algae thrives on.
7. Seed your garden pond weekly with beneficial bacteria. Dry formulas are more cost-effective than liquid, but many prefer the faster acting liquid bacteria.
Recommended products:
Beneficial Bacteria (Dry)
Microbe Lift PL
8. Add a single layer of fist-sized round stones across the bottom and on any shelves in the pond. This prevents fish from stirring up dirt that collects on the bottom of the pond.
9. Make sure your garden pond is not receiving runoff from the lawn or any surrounding ground. Raise edges a few inches with stone and foam to direct the runoff around instead of into the pond. Ban the use of fertilizers and pesticides in your yard. Remember – pond water is a more effective fertilizer than anything that you can buy in the store.
10. Do a 10-20% water change every 2 weeks. Be sure to purge the water from the bottom of the pond and add a de-chlorinator if you use city water to refill it.
Recommended product:
Pond Detoxifier
Pond Products, Pond Tips | 1 Comment »
Raising Koi: Facts and Myths
June 4th, 2014
admin
Todd Williams shared his deep thoughts on caring for koi.
Myths and half-truths. They are everywhere. Only humans can take a small nugget of truth and twist it into something entirely different. And we all like rules-of-thumb. They help us simplify a world with lots of information. But these can get out of hand. I find this to be true with koi ponds. I’ve compiled a list of frequently stated “facts.”
-Ponds can hold a max of 1″ of koi per 100 gallons
Not only is a rule for this misleading but using inches over weight is ridiculous. How can four of my 6″ inch fish possibly equal a 24″? The latter’s weight is 500% more! But it gets worse: even if you used pounds, there are simply too many other factors to have a rule-of-thumb on this topic. We’ve all seen ponds twice as big as your own that can only handle half the fish. Things like pond water turn-over, proper balance, filtration, number of plants and type of plants all matter.
Bottom line: I say just don’t use any rule of thumb on this topic.
Conclusion: Myth.
-How fast do koi grow?
Once again I think it’s misleading to even give a number. It seems that most koi experts presume you live in the warmer half of the U.S. But why? I live only a few miles from the Canadian border. My pond water is only above 70 degrees for maybe 10-12 weeks a year. That is when koi eat more and grow more. I’ve been surprised pond people don’t simply give answers to this legit question using regions i.e. plant zones.
Conclusion: Half Truth only if you qualify the answer by zone. But even then there are variables for growth.
-Stop feeding koi after five minutes
Say what? This reminds me of people who are concerned about burning their plants from watering them. I’ve seen people not water their yard for days when it’s hot, thinking water would do more harm than good. Think of it like a baby. They eat slowly. Some more slowly than others. I must admit I can’t back this one up with any science except this just does not make intuitive sense. On one website it says “whatever food is uneaten after five minutes will likely not get eaten.” That is true! On another website it says “Don’t feed them for more than five minutes.” Mmmm. Did a fact get twisted into a myth? If you have time, it’s quite OK to let your koi nibble over time. Like a baby, you can tell when they get satisfied. Conclusion: Myth.
-Don’t ever ever ever put your hose directly in the pond.
It’s assumed that chlorine could kill the fish, and it’s best to have the water spray in the air and “release” the chlorine gasses. I am certainly no chemist. But this never totally added up to me (and I have a pool so the whole chlorine thing is not new to me). In my town the water report says we have 6 chlorine parts-per-million immediately after water processed. People get confused by large numbers. How long would it take you to count to a million using one second per number? Over 11 days! Six seconds of chlorine over 11 days isn’t hurting anything. But, for the sake of discussion let’s say 6 ppm is harmful. It never made sense to me that letting the water “hit air” for literally one second would make the water safer. Guess what? It doesn’t. To verify I called my local water treatment plant. This guy’s job is to process and test city water. I told him the rule of thumb. His response makes perfectly logical sense. He said “Chlorine does dissipate with time. However, tossing a cup of water in the air will not make the PPM-count lower by time it comes down.”
If filling up a pond from scratch, it would be 100 times more important to wait a day or two before adding fish than to have the hose not be in direct contact with the water. Meaning, aquarium people are correct to let water sit out for a day if they are doing a complete water change. If you are topping off your pond, go ahead and better be safe than sorry. Leave the hose out. But your concern would be much better served by checking chemicals regularly. And to add an interesting twist. My pool repair guy always reminds me to not put the hose directly in the pool. And in a pool we want chlorine. Why? Because you can easily forget and leave the hose running in the pool overnight causing many problems. But when you leave the hose out and have it splash in, you have a much better chance of hearing or seeing the water, thus avoiding a problem. Conclusion: True on hose rule, but a myth on the reason why.
-Koi food left in pond is same as fish waste.
Let’s just say that is silly. What goes in a cow is certainly not what comes out. Think of it another way; koi food does not give plants nutrients. Fish waste does.
Conclusion: Myth.
So enjoy your pond. And next time someone states a fact, it’s OK to “ponder” if it’s really true.
Todd is a hobbyist with pond-grade koi. He (barely) got C’s in science. But he does think about a lot of things while enjoying his pond. He was considering a Twitter campaign of #StopKoiMythsNow. But his family threatened to kidnap his koi if he did.
Pond News | 3 Comments »
My pump keeps tripping my GFI!
April 2nd, 2014
PondMeister

Unfortunately I get this question all the time. Once water has seeped through the seals and gets into the motor, the GFI will trip and shut-off the electricity. When I told our customer today that her pump was “Fried” she responded:
The Customer responded:
“If the pump is fried, why does it work like a champ when plugged into a different gfi outlet?”
Not being an electrician, I forwarded her question to the Tech people at Aquascape who answered with the following:
Aquascape Tech responded:
I have attached two links that I hope will help this customer understand.
Basically if they value their life and the life of their loved ones they will use a GFCI breaker. Choosing not to do so places them at risk of electrocution in the event of an electrical malfunction. Which is exactly what they are doing by bypassing the GFCI. This has been required in outdoor receptacles since 1973.
If the pump trips all the breakers it is plugged into it is discharging electricity into the water and they can potentially be electrocuted. Sometimes you don’t even need to make contact with the pond, if the ground is wet enough, to get a bad shock if pump is malfunctioning. The reason the pump works in non GFCI outlets is that GFCI are designed to “trip” when they detect an electrical bleed. It is a safety thing.
Now sometimes the GFCI go bad and need to be replaced. It is recommended to check your GFCI monthly.
Here is a link to the consumer protection safety commission. Richard you may want to put this link up on your site or FAQ for others who have questions.
http://www.cpsc.gov//PageFiles/118853/099.pdf
Hope this helps answer their questions,
The Customer responded:
I have two outdoor gfci outlets. It is the outlet on the pond that is tripping with the pump. That outlet is still running the ion gen and the lights, however. Once I plug the pump into it, it trips. So, that outlet has enough juice to run both the ion gen and lights, but not the pump.
I have plugged the pump into ANOTHER outdoor gfci outlet (via an outdoor extension cord) and it is running like a champ.
My question: If the pump is bad, why does it run on ANOTHER gfci outlet just fine?
To which Aquascape Tech responded:
Ah okay this is a different question. There are a few possibilities.
- The electrical line or quad box does not have sufficient amperage to handle running the extra pull from the pump. A quick way to test is to plug a hair dryer into that outlet and turn it on. Many hair dryers run a good bit of power. I think mine is 1200watts, an Aquasurge 5000 pulls about 360watts. If the dryer runs when the lights and iongen are on then it tells you the pump is bad but the outlet is sufficiently big
- It is not recommended to run the pumps on an extension cord because they can interfere with the “tripping” of a GFCI. You could easily test pump at that other GFCI outlet by putting the pump in a large trash can with water in it and plugging it in. If it runs like a champ still while submerged in water then I would assume the pump is fine and you might just have a finicky breaker and would suggest replacing the GFCI.
- Another possibility is that if the pump runs great in a trash can of water plugged into GFCI but trips once connected to plumbing, there could be an obstruction in pipe line that is causing the pump to work harder and pull more juice. This is not very common, and would require that the pump was pulling almost to the limit of the GFCI. I think this theory would be easily solved by the hair dryer test.
- Another option would be to unplug the lights and Iongen and just try and run pump…. If it trips that also tells you the pump is probably failing.
I have had a few left field issues in my 10 yrs…. Sometimes breakers would trip and it turned out that the electrical line running to the pond was also running different appliances in the house, which would cause the circuit to overload. I have also had people getting a shock when near the pond and they were convinced that it was the pump, but once the pump was removed they were still getting shocked. It turned out to be an old live electric line that was for an old lamp post long gone. The electricity was able to move through the wet ground (it was a spring issue)
My takeaway from this exchange and my experience, is that once a pump trips the breaker – BEWARE! Time for a new pump!

Pond News | 2 Comments »