Low Voltage Wiring Tips
It’s that time of year when we get a lot of questions about Low Voltage lighting. Most of the questions relate to:
- Transformer Capacity
- Splicing Wires
- Wiring Layout
The great thing about Low Voltage lighting is that it is impossible to electrocute yourself.
If you do not want to use the custom “Quick-connect” plugs that come with many of the low voltage lighting systems it’s easy to splice the lights in with any existing low voltage system.
Determing Transformer Capacity
When adding lights to an existing transformer, the sum of the lights should not exceed 90% of the rated capacity of the transformer. In other words, a 100 watt transformer can take four 20 watt and one 10 watt light.
Splicing Wires
1. Just clip off the plug
2. Separate the two wires by pulling apart about 3 – 6″.
3. Strip about 5/8″ off of the new wires and the wires that you are splicing into
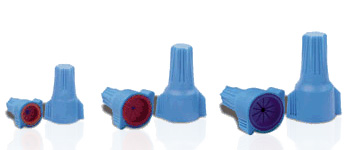
4. Take one of the existing wires and the new wire and using a Wire Connector (I like the weatherproof ones designed for Underground connections), hold the two wires together parallel and twist the Wire Connector around them tightly.
5. Repeat for the 2nd wire
6. Wrap Electricians tape tightly to wrap around each connection for extra protection
7. Make sure to keep splice above the water level
Stringing Lights Together
1. Looping
When stringing together multiple lights, rather than stringing the lights in a straight line from the Transformer out to the furthest light – String the lights in a continuous loop with a wire going from the Transformer to the first light and then bring a wire from the last light and connect with a transformer too. This evens the distribution of power to all lights. If this is not done, the last light in the string will not get as much juice as the first one. Another way is to string the lights in a “Tee Formation”
2. T-Formation
Another way to even out the power distribution is to start out with a heavy gauge wire (10 or 12 gauge) up the middle and then splice one set of wires to the right and one set of wires to the left. This will also help to evenly distribute the power load.
 Posted on: Sunday, April 25th, 2010 at 10:45 pm
  Pond Tips.
 You can follow any responses to this entry through the RSS 2.0 feed.
Both comments and pings are currently closed.

Will any low voltage landscape transformer work for pond lights or do they need to be specifically for underwater light fixtures?
May 19th, 2010 at 4:17 pmAny Low Voltage Transformer will work.
July 30th, 2010 at 9:16 amI have several waterproff low voltage LED lights. The issue is the leads are only 3 feet and they will not extend beyond the water. Is there an in expensive way to make a waterproff splice? I am thinking about soldering the wires, coating with silicone and then using shrink tubing, but i am not confident in its waterproffing ability.
March 23rd, 2011 at 3:57 amI am not sure either as I always make my connections above the water line. I would get an underwater splice kit from the hardware store or internet
March 23rd, 2011 at 10:45 pm