

Bio-Pure Pressure Filters by Alpine
Starts at: $131.25
Brand: Alpine
SKU:BKM71
MPN: PLF1000
Need accessories for this item?
View AccessoriesProduct Accessories


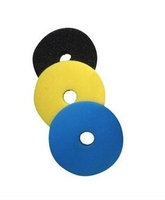
Filter Sponge for PLF2000 (BKM73)/3000 (BKM75) & PLF2000U (BKM74)/3000U (BKM76)
Part #: BKMPF06
$63.33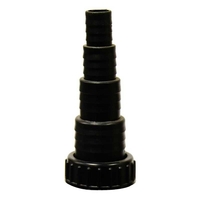
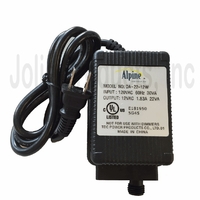
20W Transformer For PLUV1000/2000/3000 (BKA61-62-63) & PLF2000U/3000U (BKM74-76)
Part #: BKMPU02
$41.03


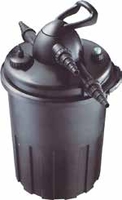
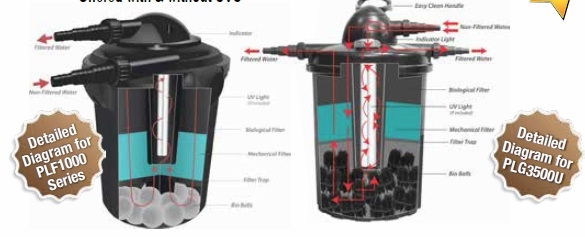
The all NEW Bio Pure Pressurized Filter is Ideal for pond owners wanting simplicity, clear water and a filter system that can be easily hidden!
Bio-Pure is available with or without an Ultra Violet Clarifier (UVC).
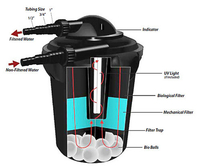
The Bio-Pure pressure filter offers multi-stage bio and mechanical filtration and is meant to be partially buried.
Large foam surface increases filtration and beneficial bacteria.
Unique external pressure indicator shows green when filter is performing properly and shows red when filter cleaning is necessary.
Pressurized filter is ideal for use with waterfall applications!
Filters Available:
Pressurized Filters Without UVC
PLF1000 - Bio-Pure Pressure Filter Without UVC (1000 Gal. Filter Capacity)
PLF2000 - Bio-Pure Pressure Filter Without UVC (2000 Gal. Filter Capacity)
PLF3000 - Bio-Pure Pressure Filter Without UVC (3000 Gal. Filter Capacity)
Pressurized Filters with Ultra Violet Clarifiers
PLF1000U - Bio-Pure Pressure Filter With UVC (1000 Gal. Filter Capacity)
PLF2000U - Bio-Pure Pressure Filter With UVC (2000 Gal. Filter Capacity)
PLF3000U - Bio-Pure Pressure Filter With UVC (3000 Gal. Filter Capacity)
PLF3500U - Bio-Pure Pressure Filter With UVC (35000 Gal. Filter Capacity)
Features:
- Multi-stage biological and mechanical filtrations process provides maximum pond filtration.
- Large foam surface provides increased filtration and beneficial bacteria to thrive and naturally clean pond pollutants.
- Unique external pressure indicator shows green when filter is performing properly and shows red when filter cleaning is necessary.
- Meant to be partially buried.
- Pressurized filter is ideal for use with waterfall applications.
- Offered with or without UVC
- 2 Year Manufacturer's Warranty
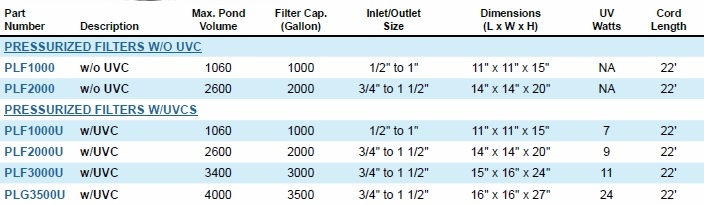
Specifications
Pressurized Filters with out UVC
Part Number Description Max. Pond Volume Filter Capacity (Gallon) Inlet/Outlet Size Dimensions (L x W x H) UV Watts Cord Length PLF1000 Without UVC 1060 1000 1/2" to 1" 11" x 11" x 15" NA 22' PLF2000 Without UVC 2600 2000 3/4" to 1.5" 14" x 14" x 20" NA 22'
22"
PLF3000
Without UVC
3400
3000
3/4" to 1.5"
15" x 16" x 24"
NA
Pressurized Filters with UVC's
Part Number Description Max. Pond Volume Filter Capacity (Gallon) Inlet/Outlet Size Dimensions (L x W x H) UV Watts Cord Length PLF1000U With UVC 1060 1000 1/2" to 1" 11" x 11" x 15" 7 22" PLF2000U With UVC 2600 2000 3/4" to 1.5" 14" x 14" x 20" 9 22" PLF3000U With UVC 3400 3000 3/4" to 1.5" 15" x 16" x 24" 11 22" PLF3500U With UVC 4000 3500 3/4" to 1.5" 16" x 16" x 27" 24 22"
1. The filter has been designed to be used outdoors, but it does not have to be submerged.
2. Do not plug-in or otherwise use this product if any part of it appears to be damaged or operates
abnormally. Have the product examined and repaired, if necessary, by a qualified electrician.
3. Make a �drip loop� on the electrical cord connecting the filter to the plug by letting a portion of the
cord hang lower than either the filter or the plug.
4. This product is designed to be permanently wired to a main power supply, housed in a dry area
and must be buried.
5. Always disconnect the plug from the outlet before any maintenance or troubleshooting is
performed.
6. Avoid the bulb overheating, switch it off when there is no water inside the filter.
7. Avoid the direct contact with UV-C light which can be harmful to your eyes and the skin.
Choose a more suitable place to install the filter. You will need to dig a six inch deep channel
connecting the blower and upper pond basins. This channel will allow you to bury and conceal the
tubing once connected. You will also need to create a hole partially bury the bio-filter while keeping it
in an upright and level position. The filter can buried in the ground up to the filter clips (See figure 1).
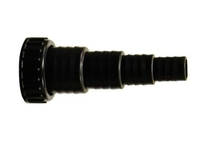
Connect your pump to the filter tubing connector marked by the symbol in arrow with flexible hose.
Lay the hose in the channel. Attach the tubing to the filters connector marked by the symbol out arrow
and lay it in the channel leading to the upper pond basin. You should use stainless steel clamps to
create a water tight seal at all of your tubing connection (filter and pump) (See figure 2). The correct
functioning of the UV-C bulb is indicated by the lighting visible on the top of the outer lid (See figure3).
After submerging the pump in water, plug it to check both the pump and bio-filter performance.
Your filter is designed to let you know when filtration performance declines. Your filter is equipped with
a color-coded pressure indicator located on the container lid. When your filter is operating
effectively, the pressure indicator will display green. If flow rate within your filter drops, performance
also declines and the pressure indicator will display RED (See figure 3). The filter can be opened and
the individual filter component can be cleaned and washed manually. Unlatch the clips and remove
the container lid. Wash the filter sponge with clean tap water.The bio-ball should only be cleaned if
they are highly contaminated and you should only use pond water to preserve the microorganisms
and keep the filter biologically active.When reassembling the device, make sure the o-ring is correctly
positioned for a watertight seal (See figure 4). If the seal is out of place or missing there will be
significant leakage when filter is operating.
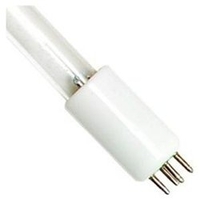
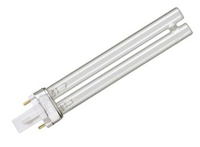
If the algae proliferate, it is necessary to check and correct the functioning of the UV-C bulb. To
change bulb, first unplug the pump and bio-filter from its power source. Rotate the lid cover, until the
arrows on the lid cover aim at the arrow on the ring holder (See figure 5). Remove the lid cover from
the top of container lid (See figure 6). Unscrew the UV light assembly counterclockwise and gently lift
out (See figure 7). Allow UV light assembly and light bulb to cool and dry completely before handling.
Once cool and dry, grip the base of the bulb with a dry cloth and gently pull the bulb from the
assembly unit (do not pull on the bulb by gripping the grass element) (See figure 8). Slide new bulb
into place until properly seated. Do not test UV light until the filter has been completely reassembled.
If the bulb works correctly the grass quartz tube where the bulb is placed must be cleaned, make sure
the appliance is switched (pump and bulb ).Open the container lid, remove the central tube which
connects to the lid (See figure 9), extract the glass tube , remove possible calcareous deposits on the
tube using a suitable product. Then reassemble all the parts making sure that the o-rings and gaskets
are correctly placed (See figure 10).
View the PDF for complete operating instructions.