
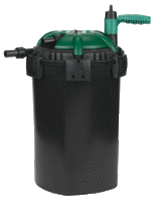
Little Giant Pressurized Filter DISCONTINUED
Pressurized biological filters promote the growth of beneficial bacteria to naturally balance the water, improving purity and clarity.
*Pressurized filtering action: mechanical and biological
*Easy to use back-flush system
*Grip-n-twist handle allows filter cleaning without removing lid
*3 Year Warranty
*Easy to use back-flush system
*Grip-n-twist handle allows filter cleaning without removing lid
*3 Year Warranty
Max. pump flow: 2400GPH
Max. pond size: 2400 Gallons
Filter capacity: 8 Gallons
Max. pressure at filter: 5.2 PSI
DESCRIPTION
This filter is designed to filter the water in small lakes and ponds, and uses two types of filter media:
DESCRIPTION
This filter is designed to filter the water in small lakes and ponds, and uses two types of filter media:
1. Mechanical filter media - High surface area sponge media traps solid waste, maintaining clean and healthful water for both fish and plants.
2. Biological filter media - Inert media (bio-balls) offer a large surface area and high porosity that allow the development of beneficial bacteria, which breaks down pollutants such as ammonia and nitrites.
CONTENTS
The pressurized filter carton contains:
Filter assembly
Bio-ball bags
O-ring
Owner's manual
Hardware kit
2 - 1" hose adapters
1 - handle
1 - cap
1 - O-ring (large)
2 - replacement hinges
The pressurized filter carton contains:
Filter assembly
Bio-ball bags
O-ring
Owner's manual
Hardware kit
2 - 1" hose adapters
1 - handle
1 - cap
1 - O-ring (large)
2 - replacement hinges
ASSEMBLY
1. Remove the filter assembly from the carton.
2. Loosen the 6 latches and remove the cover from the tank.
3. Remove the bottom plate from inside the tank, leaving the white mesh grate in place.
4. Remove the bio balls from their package(s) - separating any that have become stuck together - and place them into the bottom of the tank around the outside of the white grate.
5. Install the plate, knobs up.
6. Install large O-ring. If using a lubricant, use water-based rather than oil-based
7. Install the cover assembly and close all latches
8. Install the handle.
9. Install the small O-ring into the cap.
10. Install the cap onto the handle threads. HAND-TIGHTEN ONLY.
11. Install a hose adapter onto the IN and OUT fittings.
NOTE: Ensure all gaskets are installed. HAND-TIGHTEN ONLY unless
leaks are present
Please click PDF File below for Instructions Manual:
leaks are present
Please click PDF File below for Instructions Manual:
View the PDF for complete operating instructions.
Reviews

Lid Latchs
Found lid to pop open loosing large amount of water. had to use tie wraps around latches to keep them from popping open . Latches had groves in them as if there should have been a safety strap included
Reviewed
Fri, May 06 2016 6:26 am
by
frank rodano